
Let LOVE Grow… a Step-By-Step Origami Seed Packet Tutorial

Origami seed packets filled with home garden seeds.
Perfect for Valentine’s Day, a bridal/ baby shower, a fun kid’s activity or spring seed exchange!
Looking for a weekend activity for kids and adults alike that can double as a cute gift for your favorite gardeners? The origami seed packets are perfect for Valentine’s Day, a friend’s seed exchange, bridal/ baby shower or any spring time gathering!
Try these DIY seed packets with seeds from your own garden or a local nursery. These simple origami seed packets can be made with all types of recycled paper bags, leftover magazines/catalogs and left over scrap craft paper.
Follow the simple step-by-step guide to share your love of gardening and favorite seeds with your nearest & dearest!
Step 1

Start with a square piece of paper.
This example is a 5”x 5” square piece of paper.
Step 2
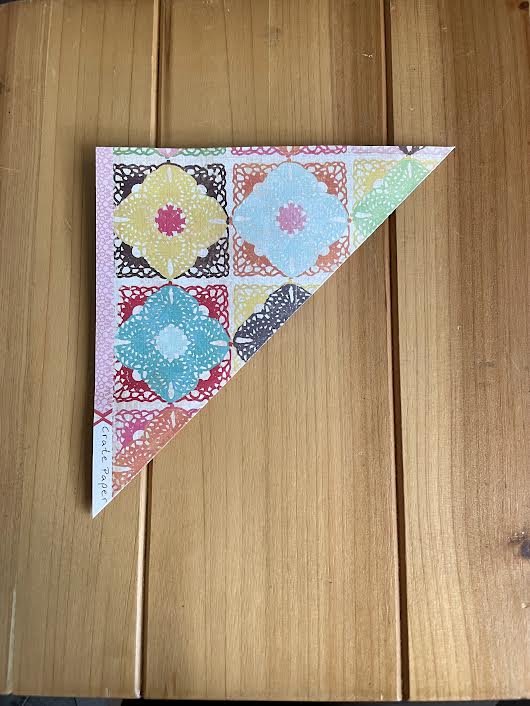
Fold into a triangle.
Fold diagonally and position so the longest side is slightly facing you.
Step 3

Fold the bottom right corner up to meet the center of the opposite side so there is a straight edge along the top.
Step 4


Repeat with the bottom left corner, again meeting the opposite side. Both corners should line up across the top edge.
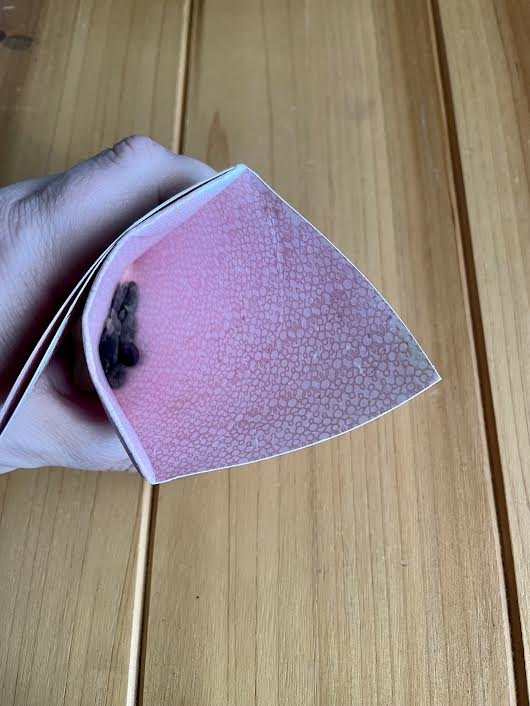
Step 5


You will see that you now have an envelope shaped similar to a plant pot! Tuck the first of the two triangles at the top into the triangular pocket created by making the previous fold in step 3.
Step 6
Place your homegrown seeds (or seeds from your local nursery!) inside the opening of the pocket made behind the fold.
Step 7

Once filled, open the front triangle fold.
Tuck the folded top into that opening and your envelope is complete. Congrats -you did it!
Step 8


Don’t forget to label the envelope with what seeds are in the packet. *If it’s for a Valentine, you can write “Let Love Grow” and sign your name!
Check out this quick video tutorial
One Seed Community Garden Step-By-Step Seed Packet Tutorial